When doing multi-attempt outbound outreach, it’s critical that calls to contacts on their first or early attempts are prioritized ahead of contacts who have already been called many times (and typically have a lower likelihood of answering/converting).
Regal allows you to do this automatically with Dynamic Campaign Priority: you can create a single campaign and elect for priority to decrease with every additional call attempt, so fresher attempts are naturally prioritized the highest.
How Dynamic Campaign Priority Works
When enabled, task priority automatically decreases by 1 for each subsequent call attempt:
Task Priority = Starting Priority - (Call Attempt Number - 1)
For example, If you set Campaign Priority at 1000:
- Attempt #1 = Priority 1000
- Attempt #2 = Priority 999
- Attempt #3 = Priority 998
- Attempt #10 = Priority 991
Note: The minimum priority is 1, so tasks never go below priority 1 regardless of attempt number.
Tracking Campaign Call Attempts
Regal tracks campaign-specific call attempts in two places. Both of these are campaign-specific and profile-specific, allowing you to track how many call attempts within a specific campaign have been completed for each contact:
1. Event Property
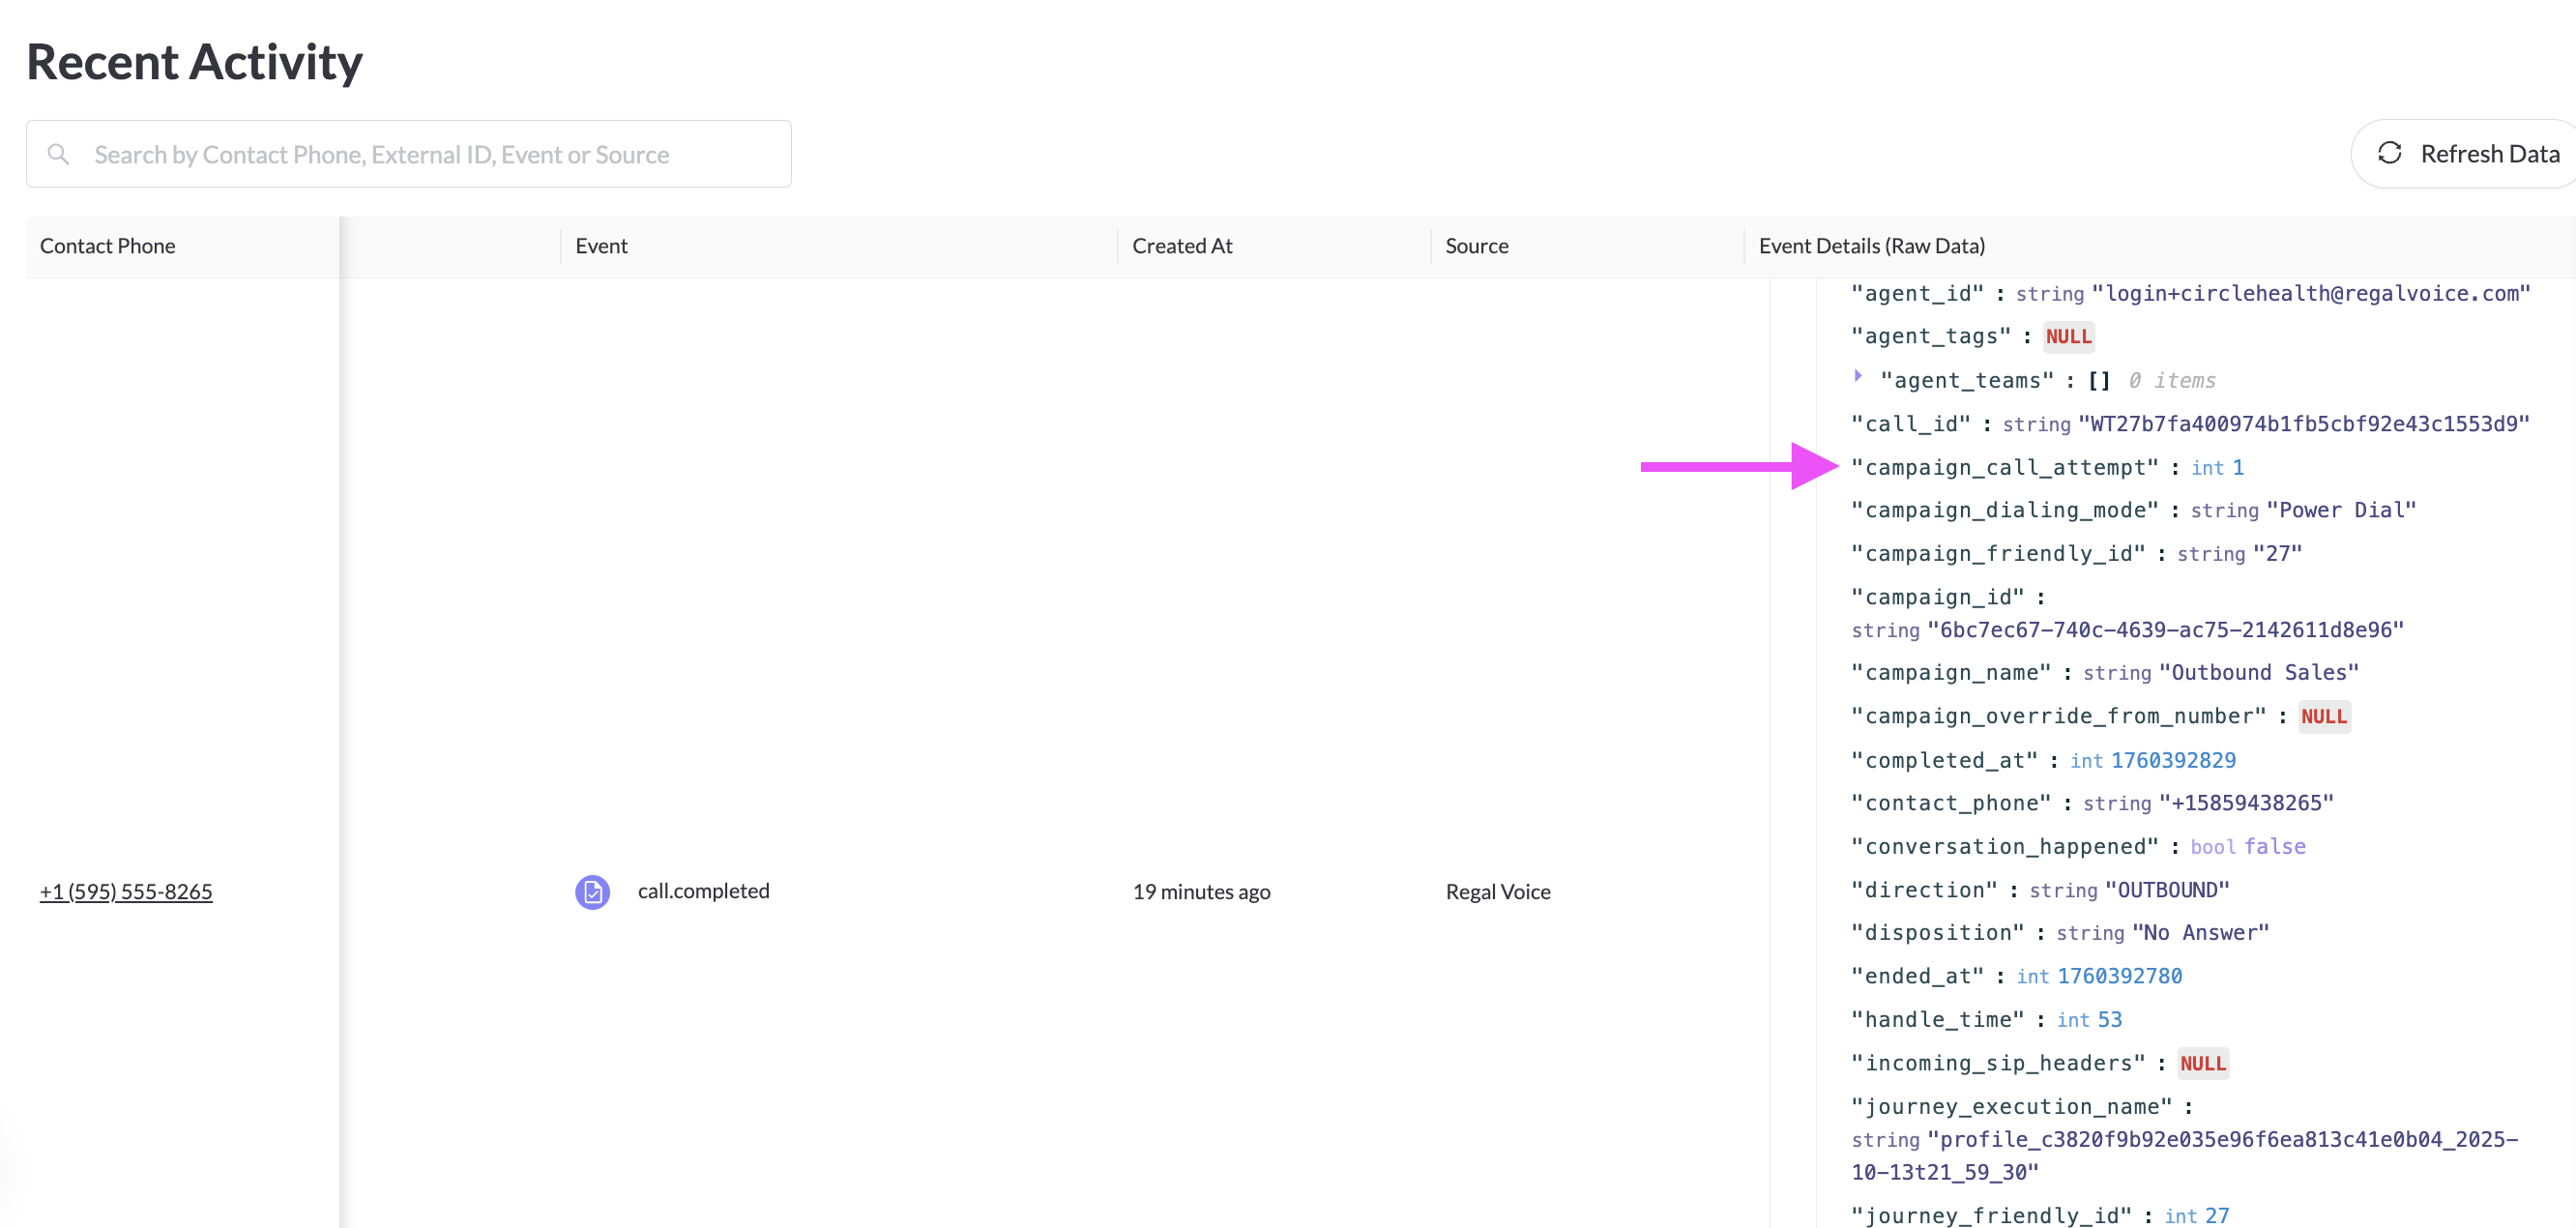
The call.completed event includes a campaign_call_attempt property that shows which attempt number was just completed for that contact in the specific campaign.
2. Task Attribute
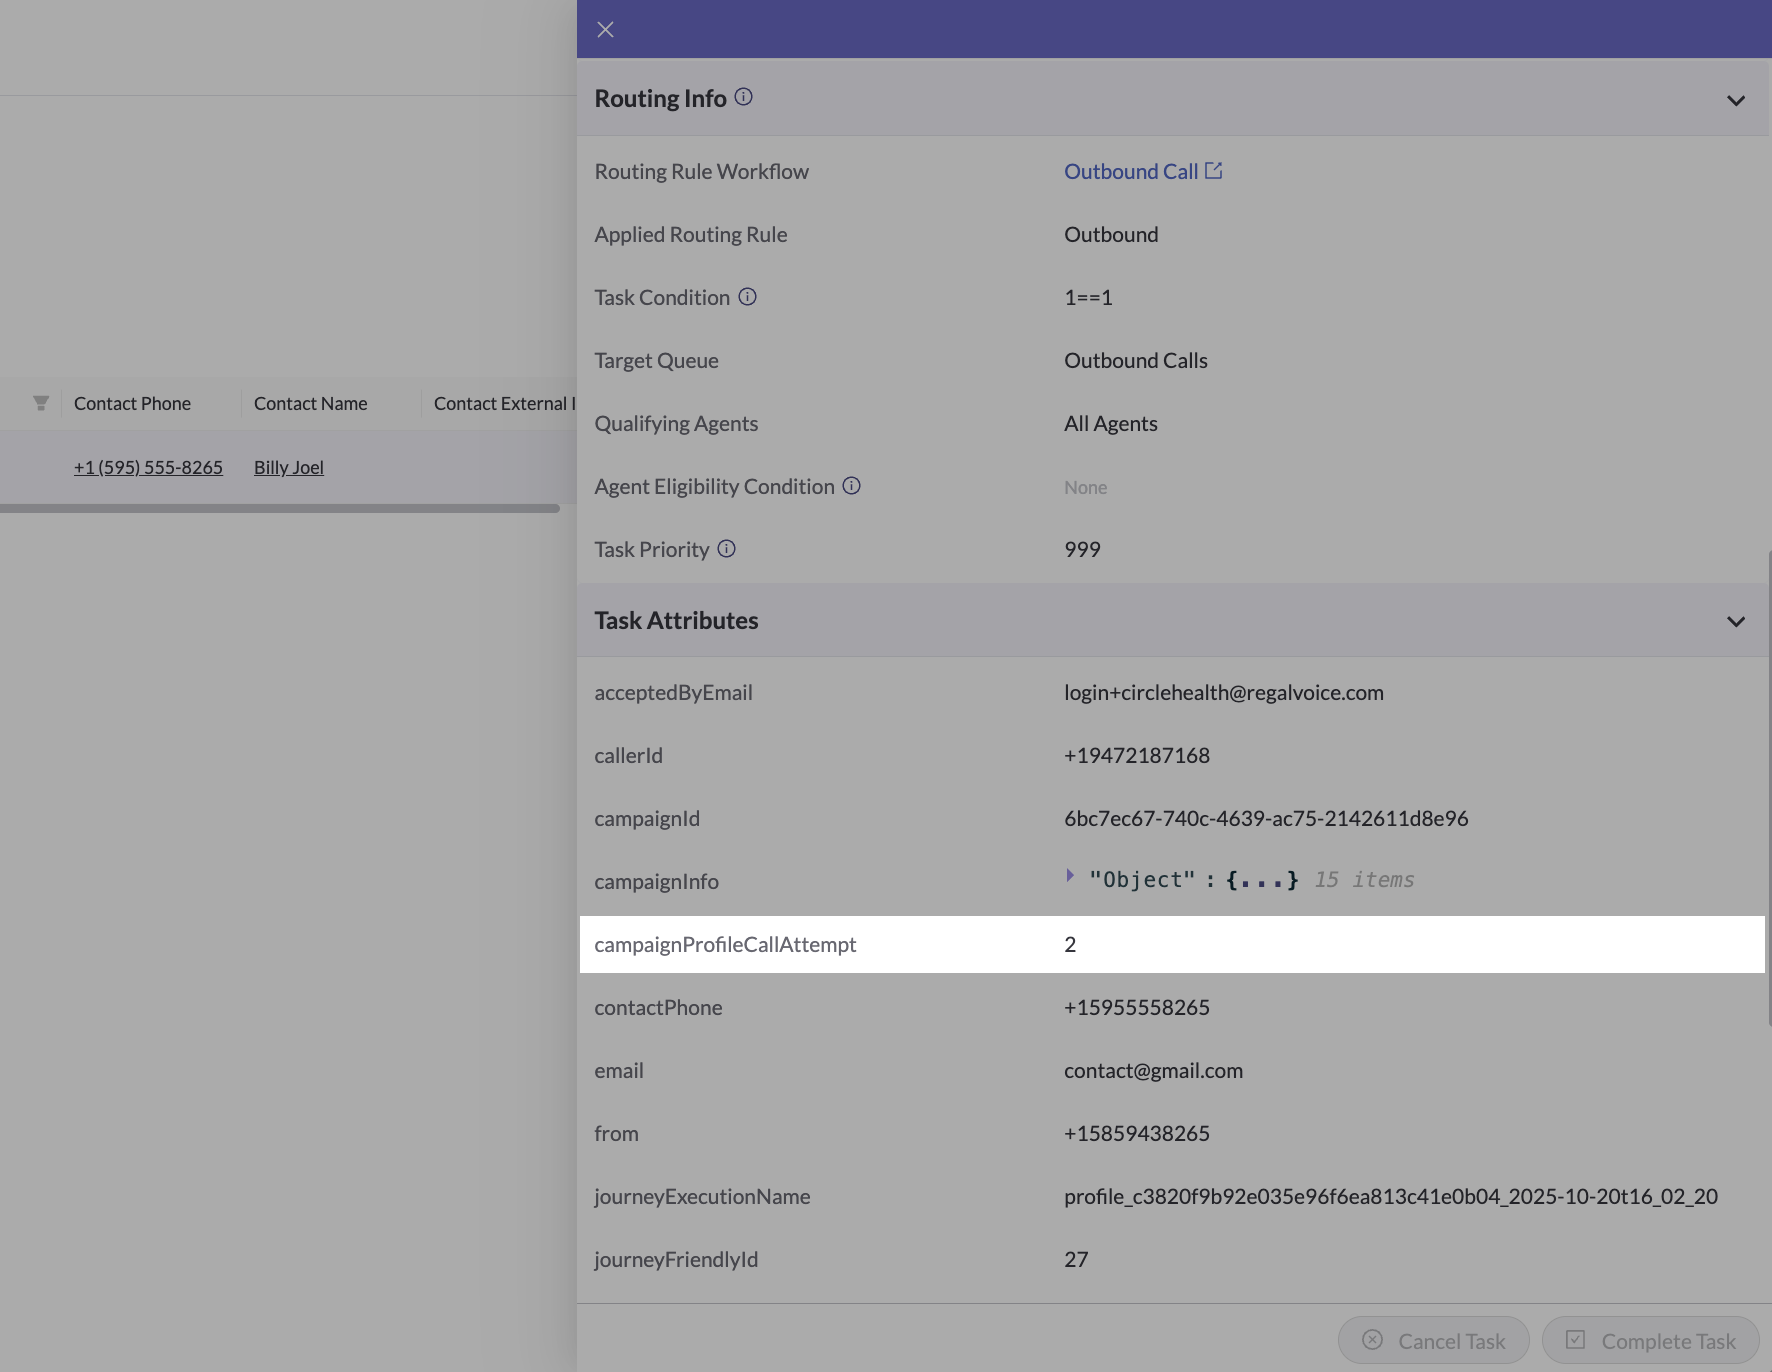
All campaign call tasks include a campaignProfileCallAttempt task attribute that indicates which campaign call attempt number this task represents.
Configuring your Multi-Attempt Outreach
Step 1: Create a Campaign with Dynamic Campaign Priority
- Create a new Phone Call campaign
- In the Campaign Priority section, toggle on "Enable Dynamic Priority Decrease for Each Call Attempt"
- Set your starting priority number as "Campaign Priority" (e.g., 1000)
- Save your campaign
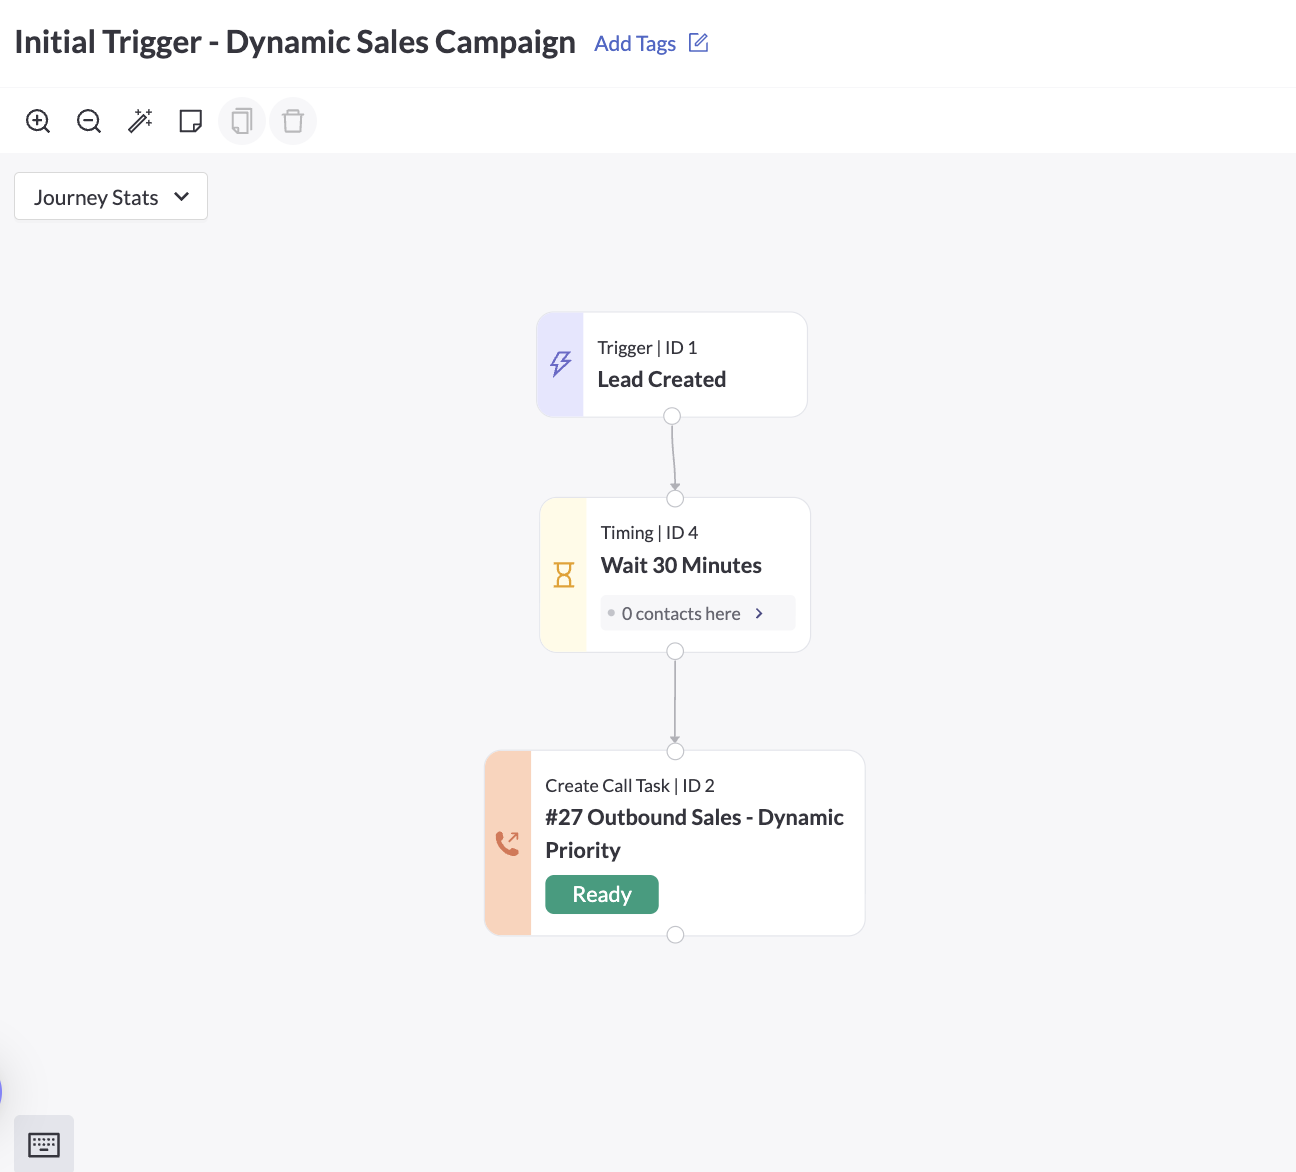
Step 2: Create Your Initial Trigger Journey
Set up a journey that triggers your first campaign call attempt from the relevant initial event (e.g., "Lead Created" event from your CRM).
Step 3: Create your Journey for Follow-up Attempts
Create a journey for subsequent call attempts:
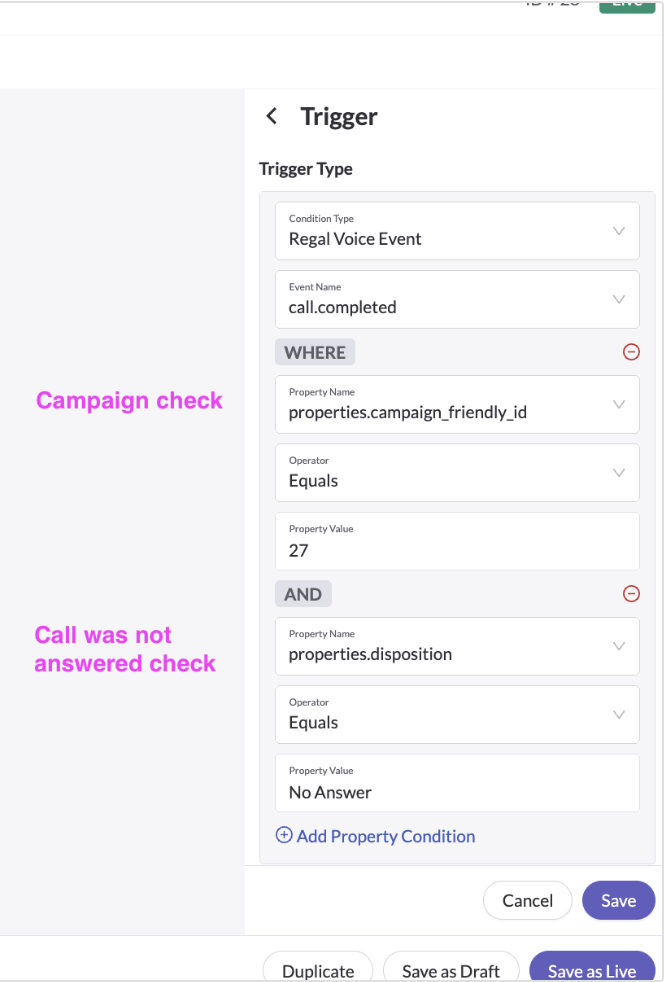
1) Set the Triggering Event: Use call.completed event with conditions to check:
- Call was completed for your specific campaign
- Call was not answered (check specific dispositions or conversation_happened = false)
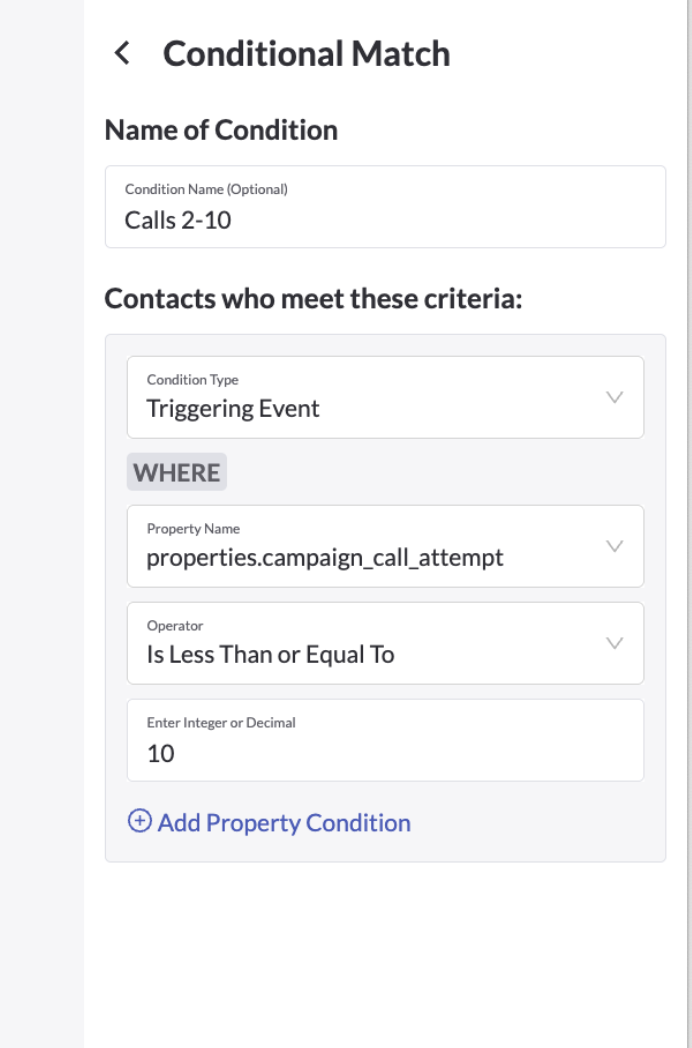
- Filter for specific campaign_call_attempt range to ensure the journey has defined stopping point (can also be controlled via Conditional Match)
2) Add a Conditional Match Node: Reference the campaign_call_attempt property on the call.completed event to:
- Control different behaviors (e.g., wait times between attempts)
- Ensure the journey has a defined stopping point
- Route to different paths of outreach strategy based on attempt number
⚠️ Important: Always enforce a check on call attempts in your journeys using either the event trigger or a Conditional Match node. Without this, you could create a never-ending journey.
3) Direct to the Same Campaign: Route all attempts to the same campaign to maintain dynamic priority
Migration Tips
If you're currently using multiple campaigns for different call attempts:
1) Create a NEW campaign with dynamic priority enabled (rather than updating existing campaigns)
2) Set up new journeys for the dynamic priority campaign
3) Once your new journey is tested and ready, redirect your initial Call 1 journey to the new dynamic priority campaign
Important: Keep your old followup attempts campaigns and journeys live until all contacts have reached the end of your journey. This way, new leads are directed to your new flow but prior leads are not dropped.
4) Phase out the old multi-campaign setup and turn off their old associated journeys once all contacts have flowed through the entire journey
Reporting and Monitoring
Dynamic Campaign Priority comes with several fields that make reporting on multi-attempt campaigns easy.
Key Fields
1) Campaign Title: A richer descriptive value of a campaign, indicating the call attempt number if using dynamic campaign priority strategies.
- Format for dynamic campaigns: [Campaign Name] | Attempt X (e.g., “Outbound Sales | Attempt 3”)
- For static campaigns (not using dynamic priority), Campaign Title = Campaign Name
2) Call Attempt: The number of call attempts for this profile/contact within this campaign (e.g., if this task is the 3rd call attempt to this contact, Call Attempt = 3).
- Note: This information is populated on all campaign tasks, regardless of priority strategy.
3) Campaign Priority Strategy: The priority strategy (dynamic or static) chosen for this campaign/call.
- Dynamic (Call Attempt) – Campaign has dynamic priority enabled.
- Static – Traditional static priority (dynamic priority is not enabled).
- You can use this field to filter campaigns or campaign tasks by whether they use dynamic priority.

Analyzing Campaign Performance
To evaluate campaign performance (answer rate, transfer rate, conversions, etc.) across attempts within a dynamic campaign, split your analysis by Campaign Title or Call Attempt.
To compare outreach across campaigns without attempt breakdowns, group by Campaign Name instead. This aggregates all attempts for a campaign-level view.