Overview ✉️
Regal enables agents to reach out to their customers with calls, SMS, and email all in one place.
Agents can use the email channel to:
- Engage customers that prefer email, or haven't responded to calls/SMS
- Quickly follow up with pricing or product details after a call
- Respond to customer questions or requests without dropping a thread
- Increase the reach and formality of their communication
Setup 🚀
Connecting an agent account
To initiate outbound emails or respond to inbound customer emails, you must sync your email account with Regal. Support is currently available for Gmail and Outlook accounts, and one account per agent. Once connected, Regal will automatically generate inbound email tasks for any customer email, that is, any message where the sender email matches a contact email in Regal.
To connect your account, click the 'My Settings' option in the status dropdown at the top right of the page. Then click the "Sign in" button for Gmail or Outlook.
You will be prompted to sign into your email account and provide necessary permissions. Make sure to select your proper work account, rather than your personal account.
After doing so, the integration tile will display a 'Connected' status with an option to sign out.
Once connected, Regal syncs with your inbox so that:
- emails you send from Regal will appear in your 'Sent' folder
- emails you receive from customers will appear as email tasks in Regal for you to respond to
- all customer email threads - regardless of whether you respond from Regal or from your inbox - will appear in the relevant customers' activity feeds in Regal
Regal supports one connected account per agent. You can reach out to support@regal.io to disconnect any agent account.
Connecting a shared email account or distribution list
A shared email account (e.g. sales@dundermifflin.com) is an address with a corresponding inbox that is typically access by multiple agents via shared credentials. Admins can connect shared email accounts in the My Settings page, just like an individual agent account.
Emails that come into Google Groups are referred to as distribution lists. Regal automatically connects with your distribution lists if at least one of the members of the associated Google Group has connected their Gmail account to Regal.
If you are relying on shared email accounts or distribution lists for customer communication, let your CSM know. We can configure your routing rules accordingly, so that inbound emails from Regal contacts to shared email accounts or distribution lists automatically generate inbound email tasks in Regal for agents to handle.
Regal supports one shared email account per admin. If you would like to connect more accounts, or to disconnect an existing account, reach out to support@regal.io.
Sending an email from an existing task 📬
Once your email account has been synced to Regal via My Settings, you can send emails in Regal from that address.
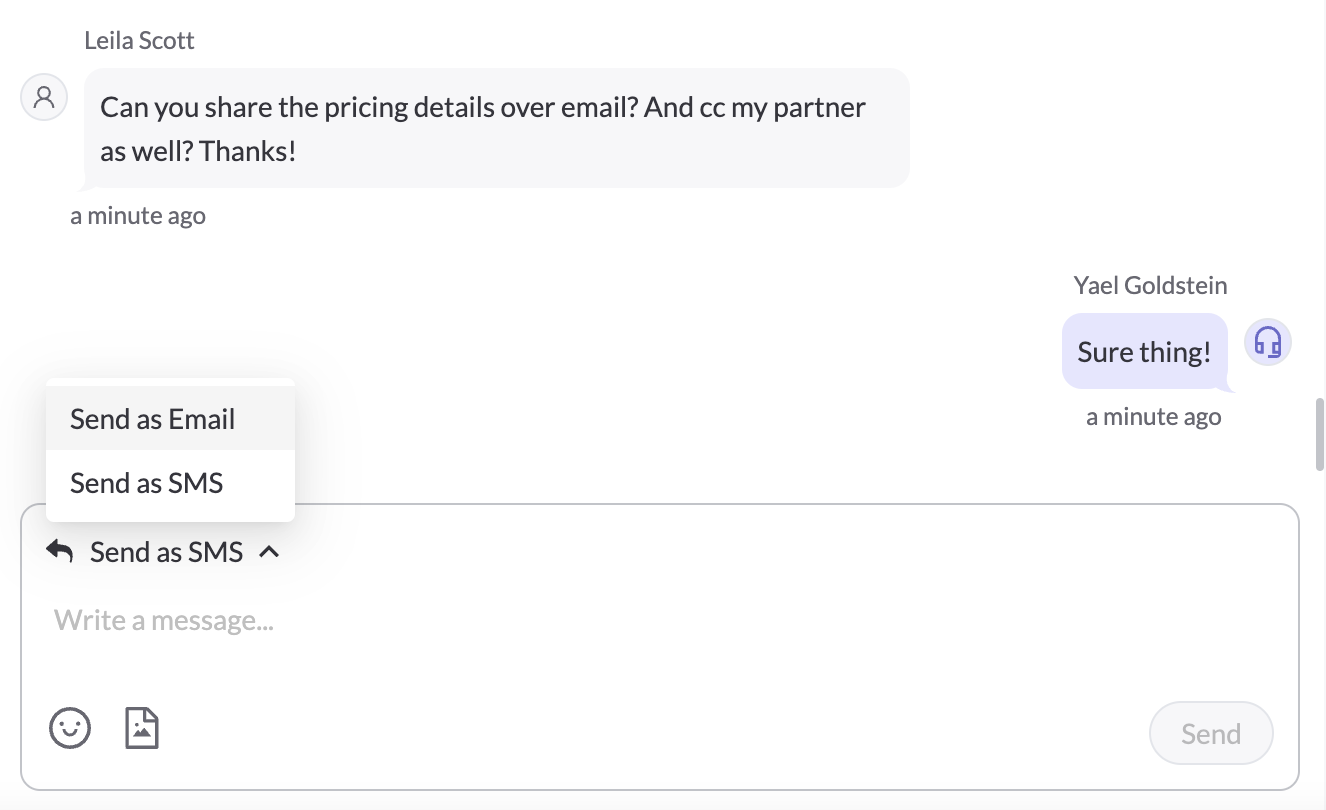
Emails can be sent from any task via the text input. By default, SMS and call tasks show the SMS input. To switch to an email input, hover over the input toggle and select 'Send as Email'.
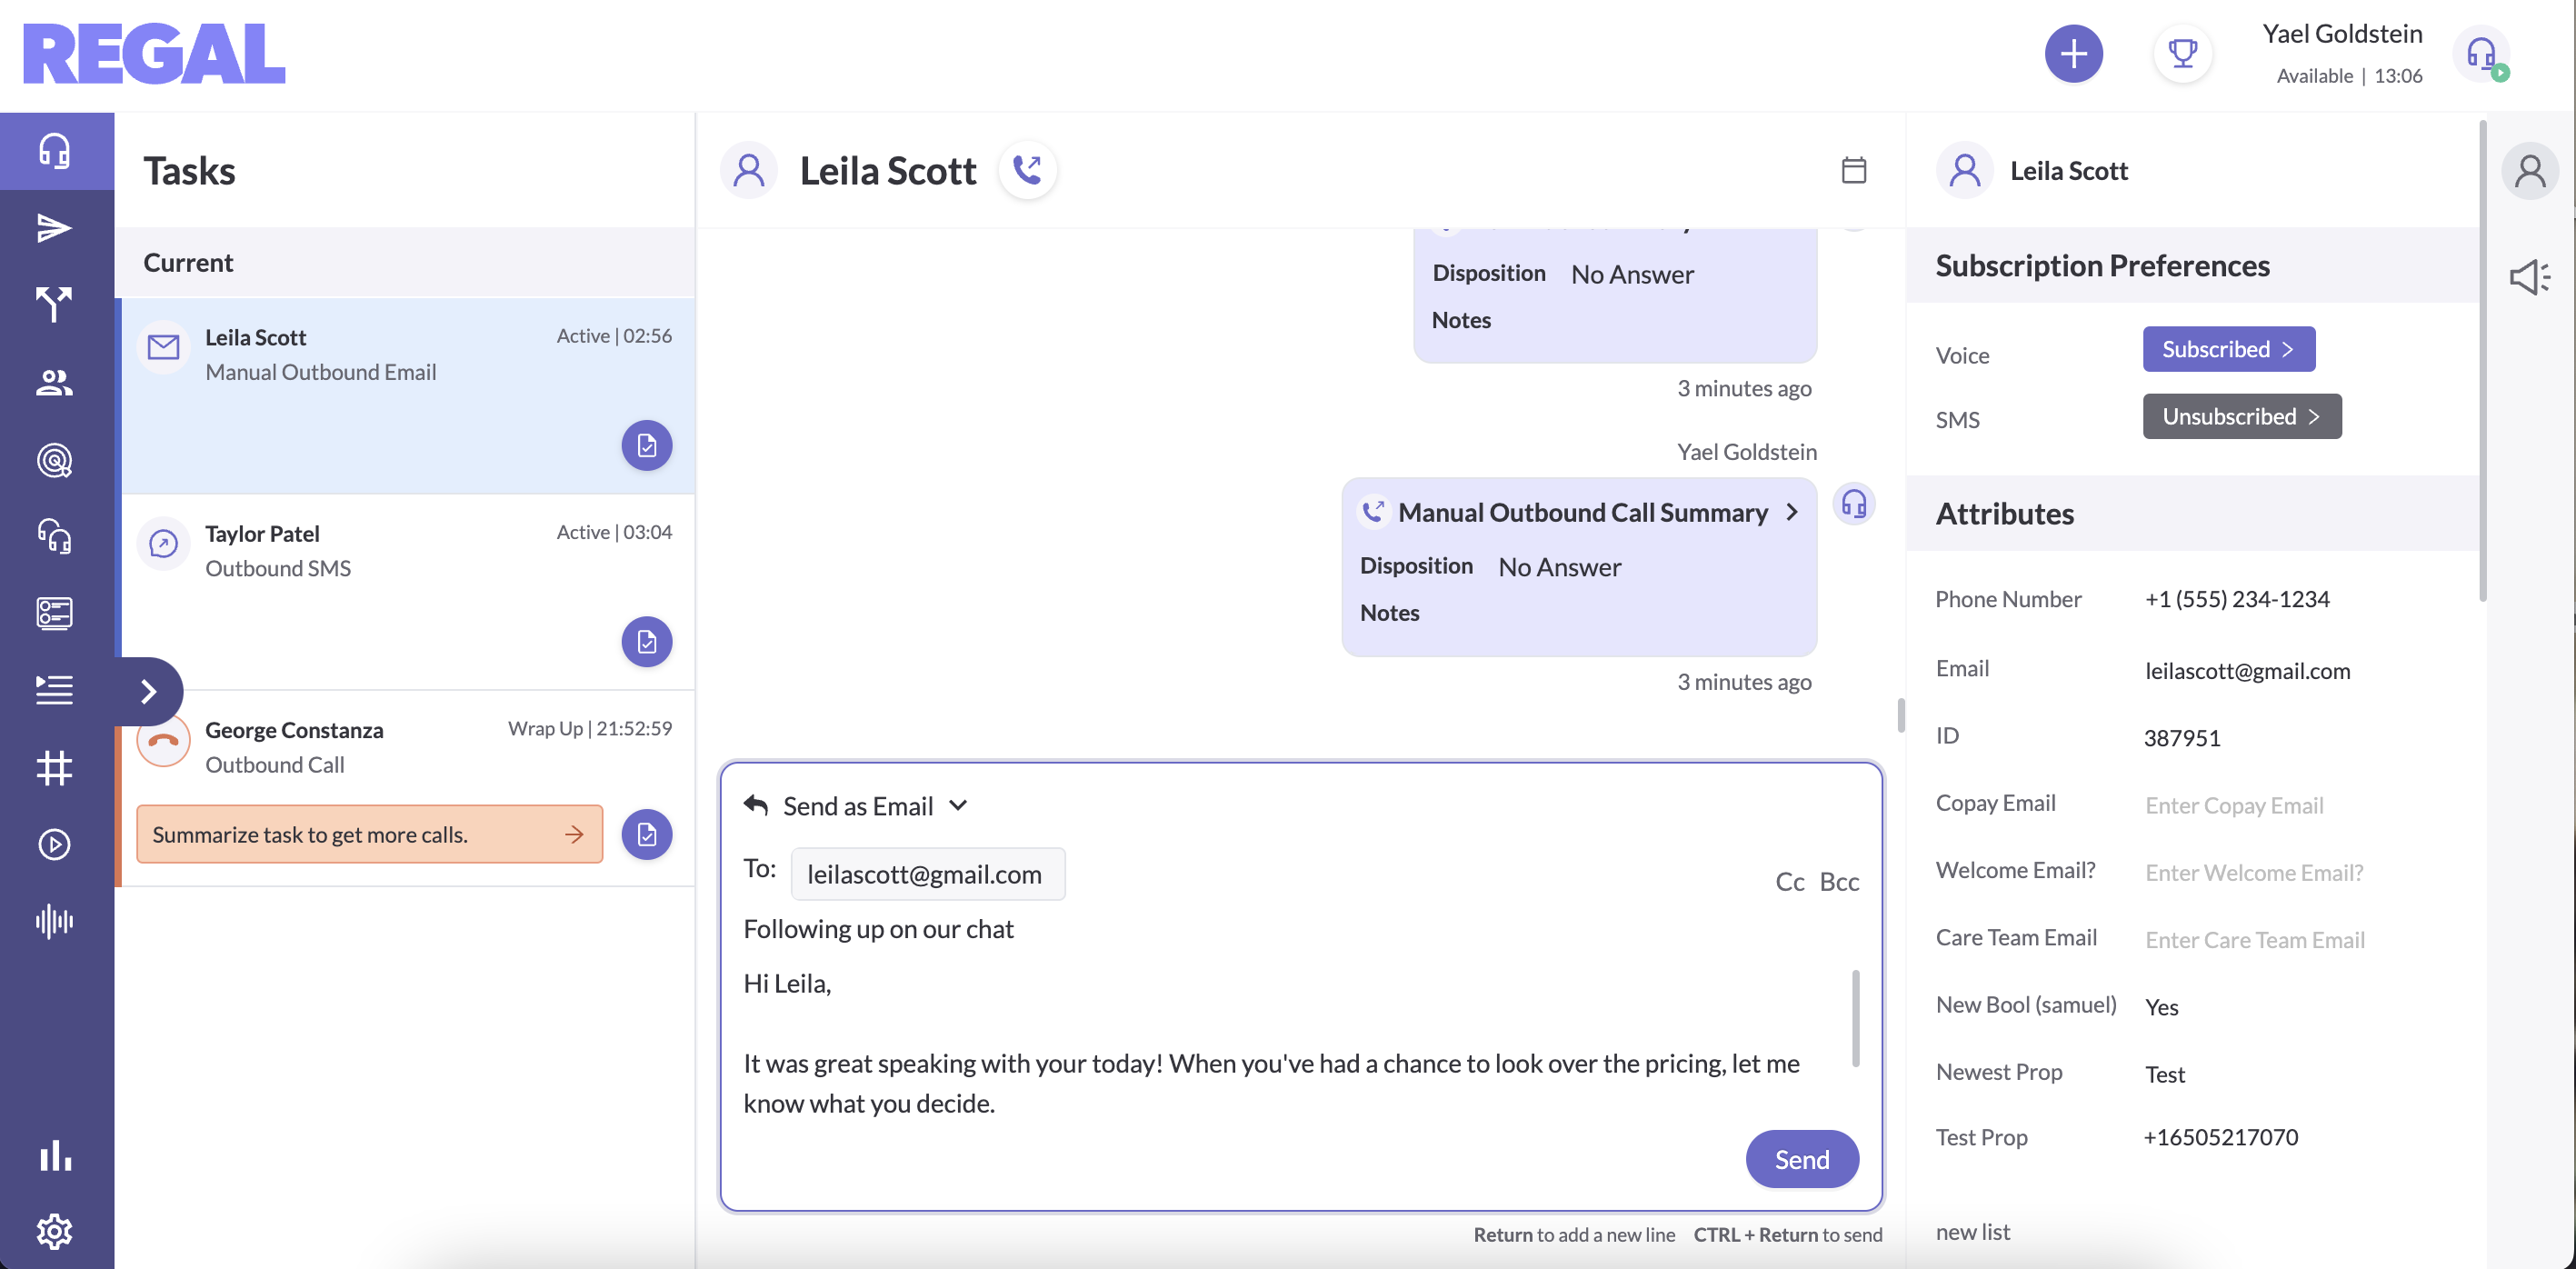
By default, the "To" line of the email is pre-filled to the email address of the contact, as listed in the Attributes section of the contact profile.
Email templates are quickly accessible via the Templates icon. The subject line prescribed by the email template will not override the existing subject line, if one is present.
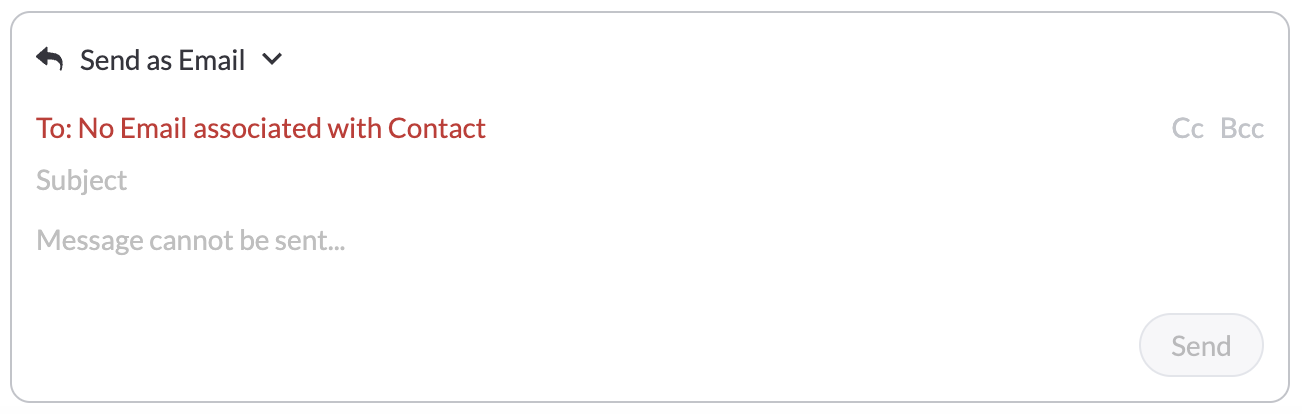
If the customer does not have an email in Regal, the following error message will appear in the input. In order to email a customer from Regal, there must be an email on the profile. Once an email is added to the profile, the email input will become editable.
Agents can cc or bcc additional addresses by clicking on the "Cc" and "Bcc" text to the right of the "To" line.

After filling out the "To" line, subject line, and body, click "Send" to send the email. Once sent, the email will appear as the most recent item in the customer's activity feed.
Hyperlinking text
To add a hyperlink, highlight the relevant text and click on the link icon:
Input the URL and click Confirm to create the hyperlink.
You can edit the display text or link by clicking on the hyperlink in the text input.
Attachments
To upload an attachment, click on the paperclip icon and select the files you'd like to attach.
Attached files must be under 10MB total. The following file types are supported: jpg, jpeg, png, bmp, gif, csv, doc, docx, mp3, mp4, pdf, ppt, pptx, xls, xlsx.
Expand the input
To expand or collapse the text input, click the icon on the top right:
Initiating a new email conversation ➕
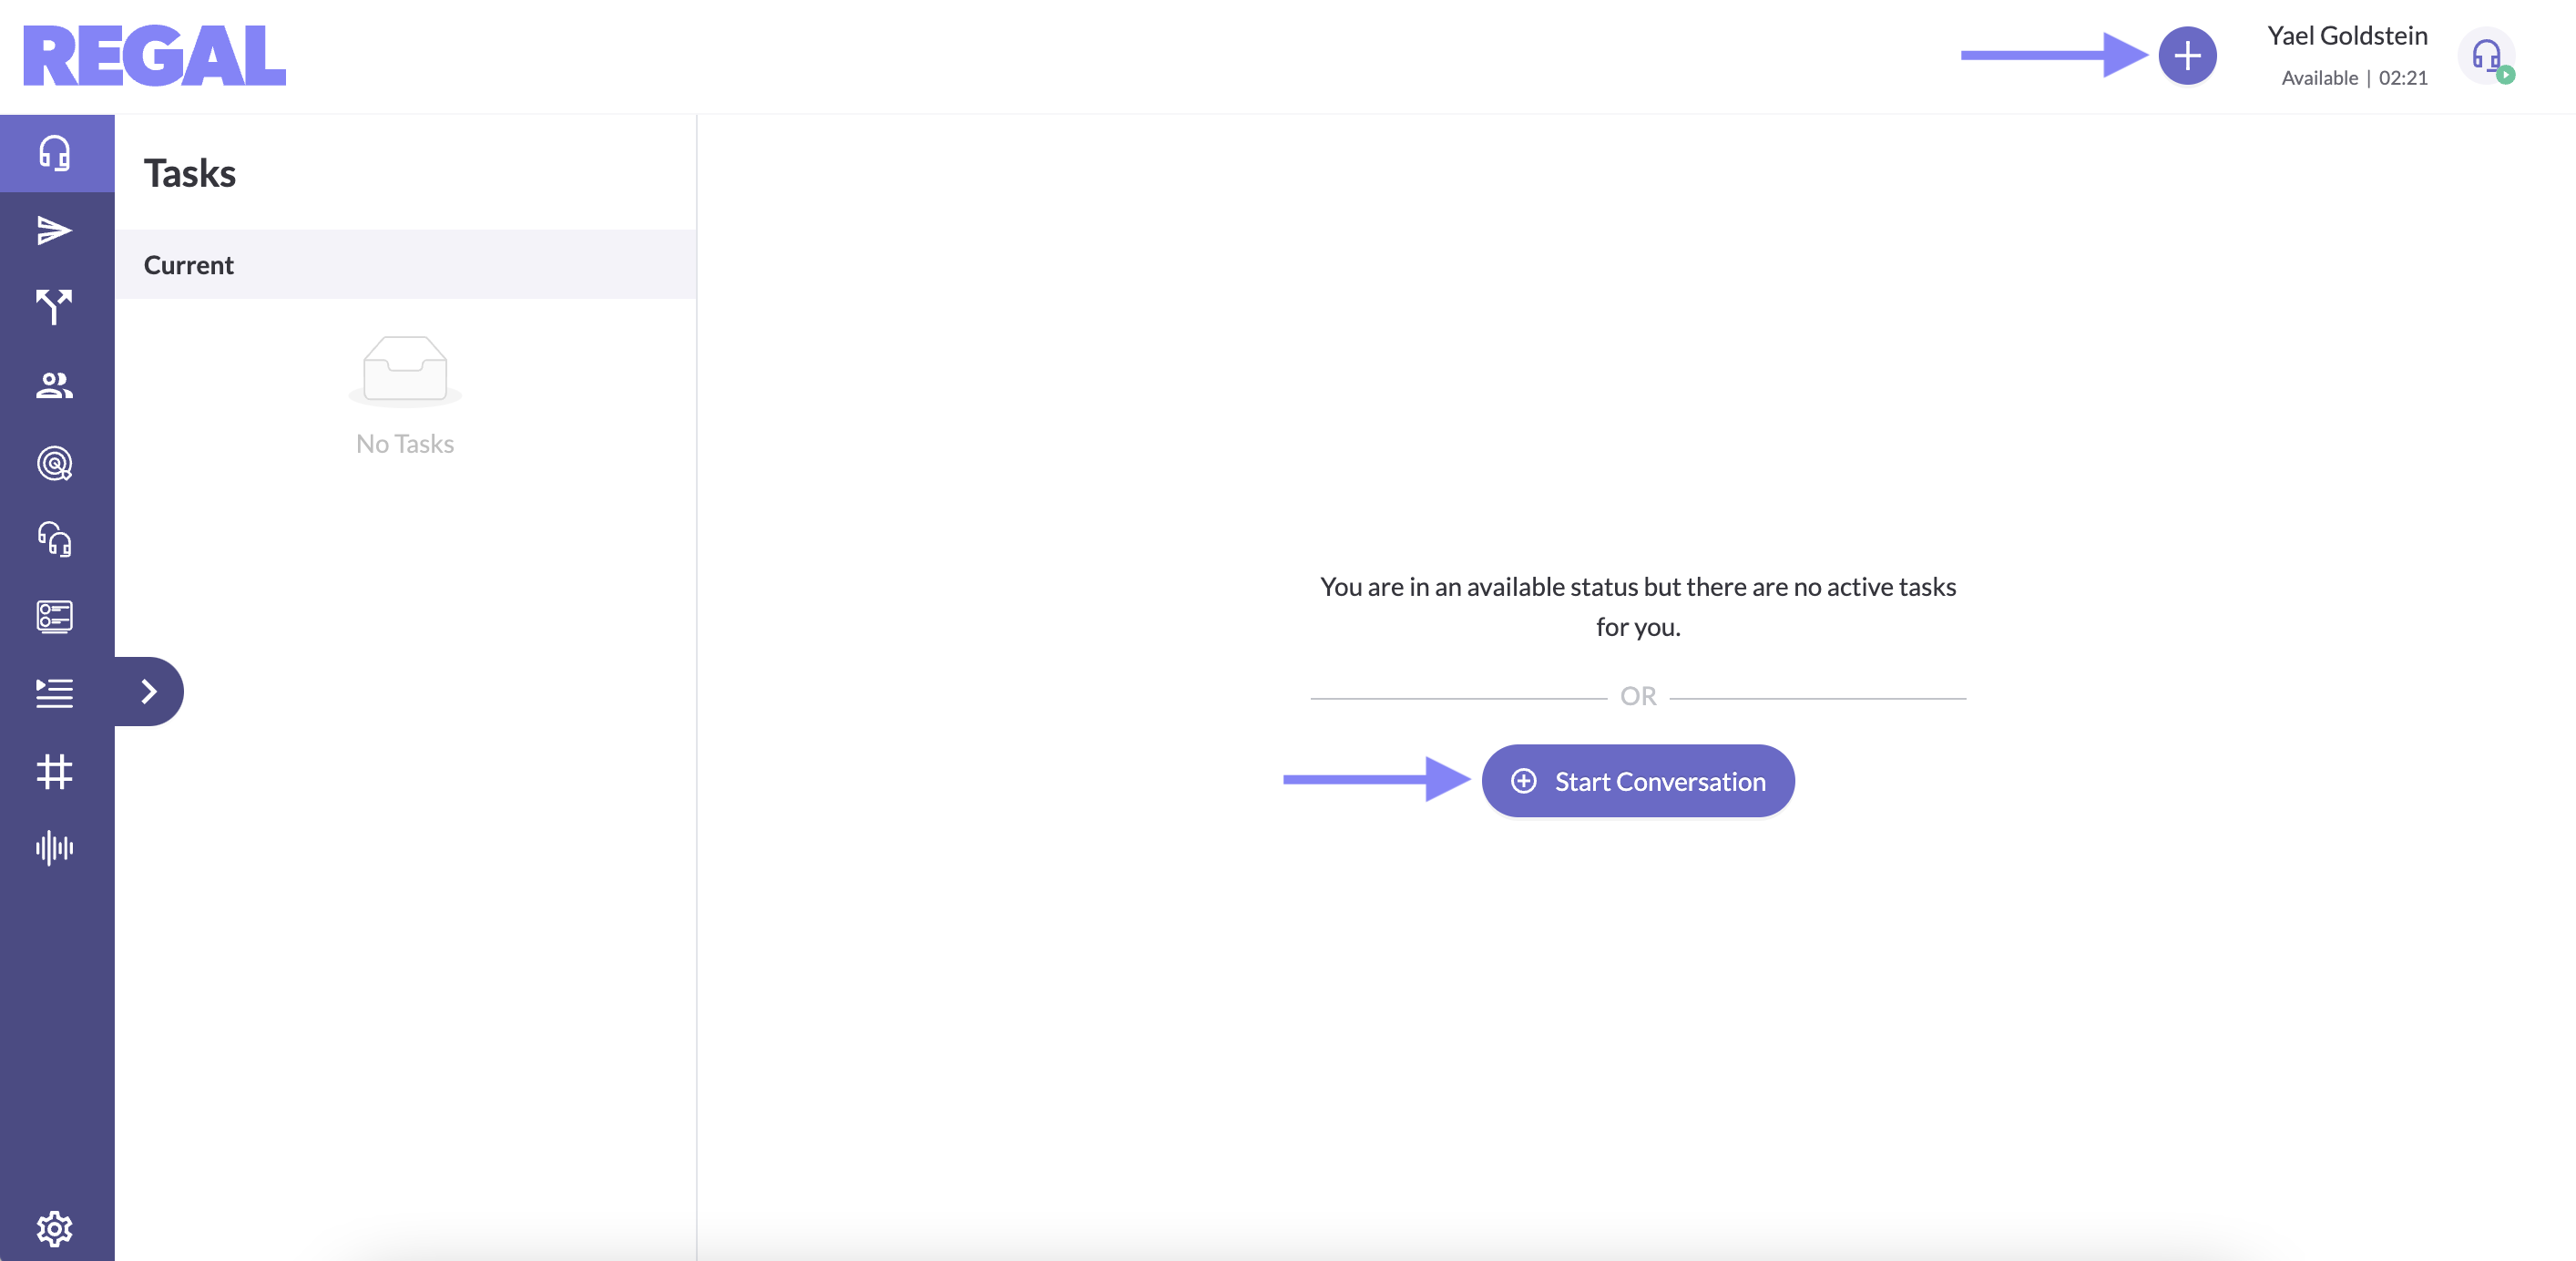
To create a new email conversation with a customer, click the + button or Start conversation button.
Then search by name, phone number, or email for the customer you want to email. Click the email icon to create a manual outbound email task.
A new manual outbound email task should appear in your task list. Just add a subject and message body to send!
You can also place calls or send texts from an email task. The FROM number is the default phone number set for your account.
Assigning inbound customer emails ➡️
Inbound Email Task Creation
Inbound email tasks are automatically created when a customer sends an email to an agent (e.g. yael@dundermifflin.com), distribution list, or shared email account (sales@dundermifflin.com). Regal categorizes emails as coming from a customer if the sender email matches a contact email that's already in Regal. In order for Regal to recognize that an email is associated with a customer, the customer's email must be present in the "From", "Sender" header, "Cc", or "Bcc" fields of the email. In addition, the email recipient (agent or shared email account) must be synced with Regal (see Setup instructions).
Regal uses a prioritization system to determine which contact an inbound email task should be associated with, based on your account configuration. For standard synced accounts (that are not configured to create new contacts, as outlined below), Regal checks for existing contacts in this order: From address first, then Sender address. If no contact is found in either field, Regal will check Cc and Bcc fields as a fallback. If no existing contact is found in any of these fields, the email is ignored and no task is created.
Inbound Email Contact Generation
You can configure certain synced email accounts (e.g. sales@dundermifflin.com) to generate new contacts in Regal, ensuring that any email sent to these accounts creates a new profile and task in Regal that can be handled by an agent. For those accounts configured to generate new contacts: when determining which contact to associate with a new inbound email task, Regal prioritizes email addresses in this order: From, then Sender.
Inbound Email Contact Generation using "Reply-To" (if present)
For those email accounts configured to generate new profiles in Regal, you can further configure them to create distinct profiles based on "reply-to" addresses in inbound emails. With this configuration, if an email is sent to the account that contains a "reply-to" address that is different from the "From" address, a new profile and task will be created based on the "reply-to" address. When Reply-To contact creation is enabled, Regal prioritizes Reply-To first, then From, then Sender when determining task association.
For example: if sales@dundermifflin.com is configured to create new profiles using "reply-to" and receives an inbound email sent from fromemail@gmail.com with "reply-to" replytoemail@gmail.com, a new profile and corresponding inbound email task will be created for replytoemail@gmail.com.
Distribution Lists
Customer emails sent to distribution lists will generate inbound email tasks if there is at least one agent or shared email account in the distribution list's associated Google Group that is synced with Regal.
Inbound Email Task Routing
By default, inbound email tasks will route to the agent that was emailed by the customer. If multiple agents are emailed by the same customer, the task will be routed to all relevant agents. Your account can also be configured to
- route inbound emails to shared email accounts (e.g. sales@dundermifflin.com) round-robin to all agents, or agents with certain skills
- route emails to all agents if the agent who received the email is not available to respond
Why did my inbound email task get assigned to this contact?
You can reference the email.received event for an inbound email to understand which contact the inbound email task is associated with. The fields in the event properties will be populated with the headers of the received email: including from_emails, to_emails, cc_emails, reply_to_emails, sender_header_emails, and delivered_to_emails. The sender_email field contains the email address of the contact that the task will be associated with, based on the prioritization logic detailed in the above sections.
Domain Blocking 🚫
To prevent internal/spam emails from entering the platform or creating profiles, Regal can be configured to block certain domains. If a connected email account receives an email from a blocked domain, that email will be ignored - it won't create an email task or contact in Regal even if the agent address is configured to create new emails/profiles.
"Allow List" of Emails to Override Domain Block
If there are certain emails within your blocked domain that you still want to bring into Regal (for example, there are some internal emails that you don't want to block), you can configure specific email addresses to override the domain block.
Example Scenarios
Let's say you have this configuration:
- dundermifflin.com domain is BLOCKED
- sales@dundermifflin.com is your connected email account, and it's configured for Inbound Email Contact Creation
- support@dundermifflin.com is on the Allow List for sales@dundermifflin.com
1. Regular Internal Email (Blocked 🚫)
This will be blocked from Regal as yael@dundermifflin.com has a blocked domain and is not on the Allow List.
2. From Allow List Email (Allowed ✅)
This email will override the domain block - a new profile will be created for support@dundermifflin.com (if it doesn't already exist) and an inbound email task will be created.
Advanced Scenarios with Reply-To
If sales@dundermifflin.com is configured for Inbound Email Contact Creation based on Reply-To, and an inbound email has a "reply-to" that is different than the "From" address, we will check whether the Reply-To is on the Allow List. The above behavior will still apply for inbound emails without a distinct reply-to.
1. Reply-To is on Allow List (Allowed ✅)
This email will override the domain block, a new profile will be created for support@dundermifflin.com (if it doesn't already exist), and a task will be created.
2. Reply-To is NOT on Allow List (Blocked 🚫)
Since sales@dundermifflin.com is configured to create inbound contacts using the reply-to (if reply-to is present and different than the "From" address), this email will be blocked because ellen@dundermifflin.com is NOT on the Allow List.
Responding to an inbound email 📨
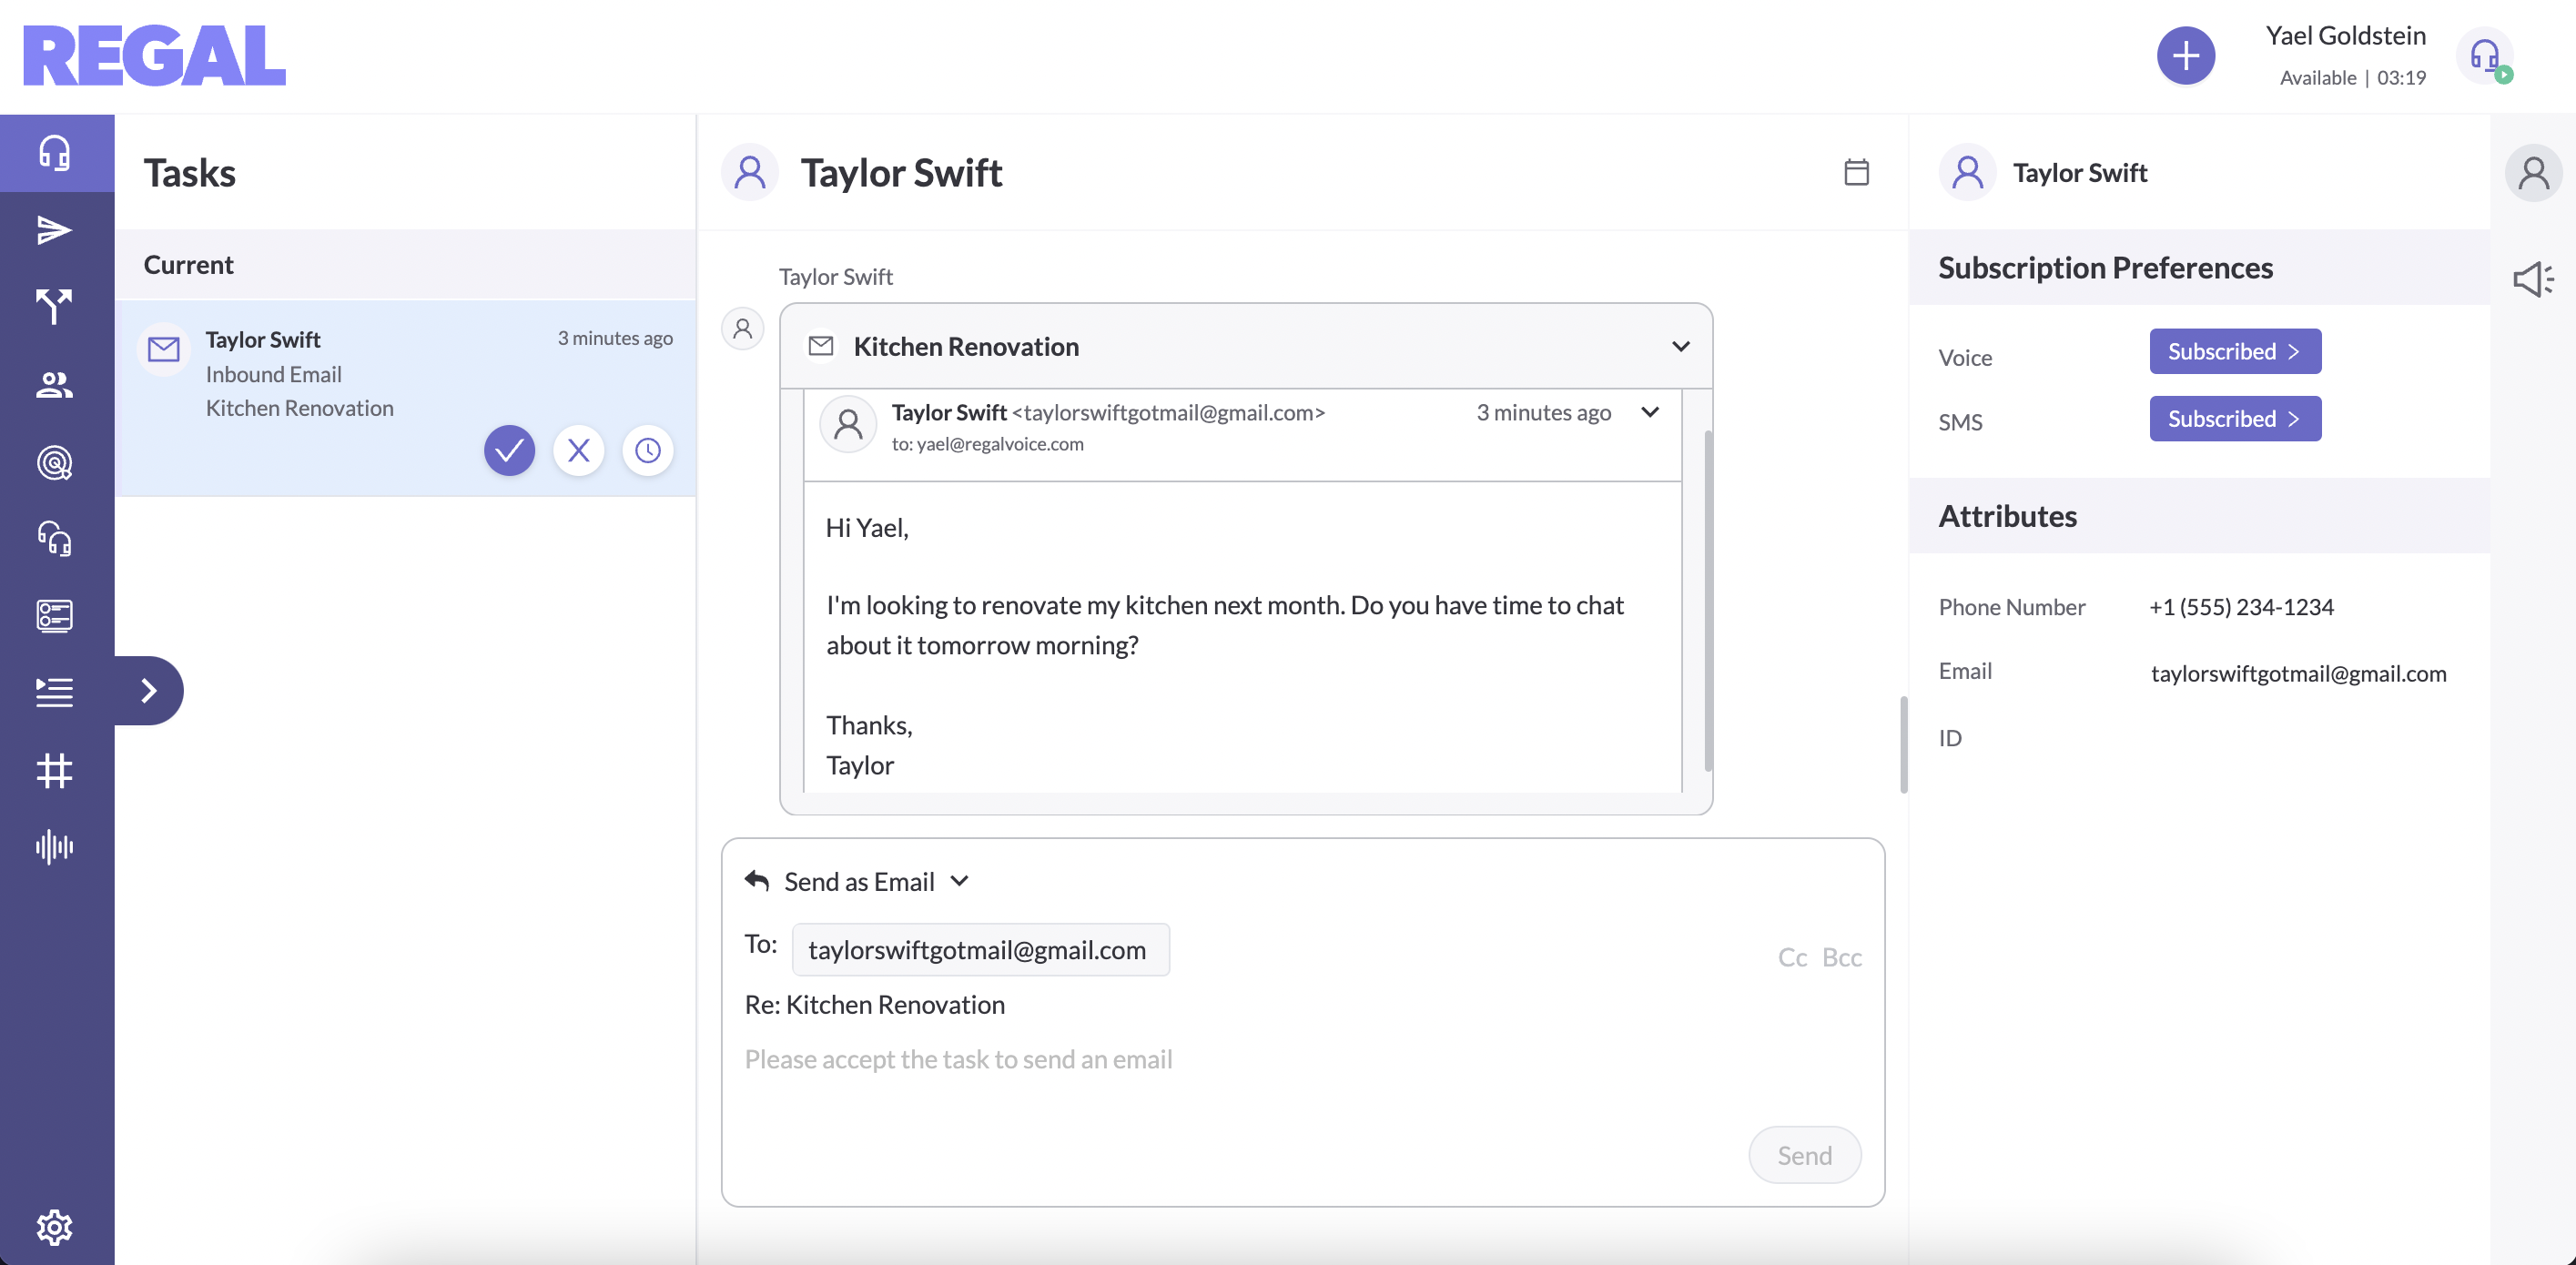
Inbound emails will appear on the Agent Desktop as Inbound Email tasks. Click the check mark button on the task card to accept the task and respond to the email.
Agents can also click the Reply / Reply All / Forward icons on any email in any thread to respond to that email. Note that forwarded emails will not appear in the contact's feed, unless they are being forwarded to the contact.
For Inbound Email tasks, the email input headers are prefilled to "Reply All" by default, and agents can add or remove email addresses from any of the "To", "Cc", or "Bcc" fields as needed. The subject line is prefilled to match the subject line of the inbound thread and cannot be edited.
After filling out the email body, click the "Send" button to reply to the customer's message.
Summarizing email tasks ✅
Agents must summarize an email task like any other. To summarize an email task, click the summary button on the task card. Then fill out the Disposition, Tags (Optional), and Notes (Optional) sections, and click Complete Conversation.

Email Threading 🧵
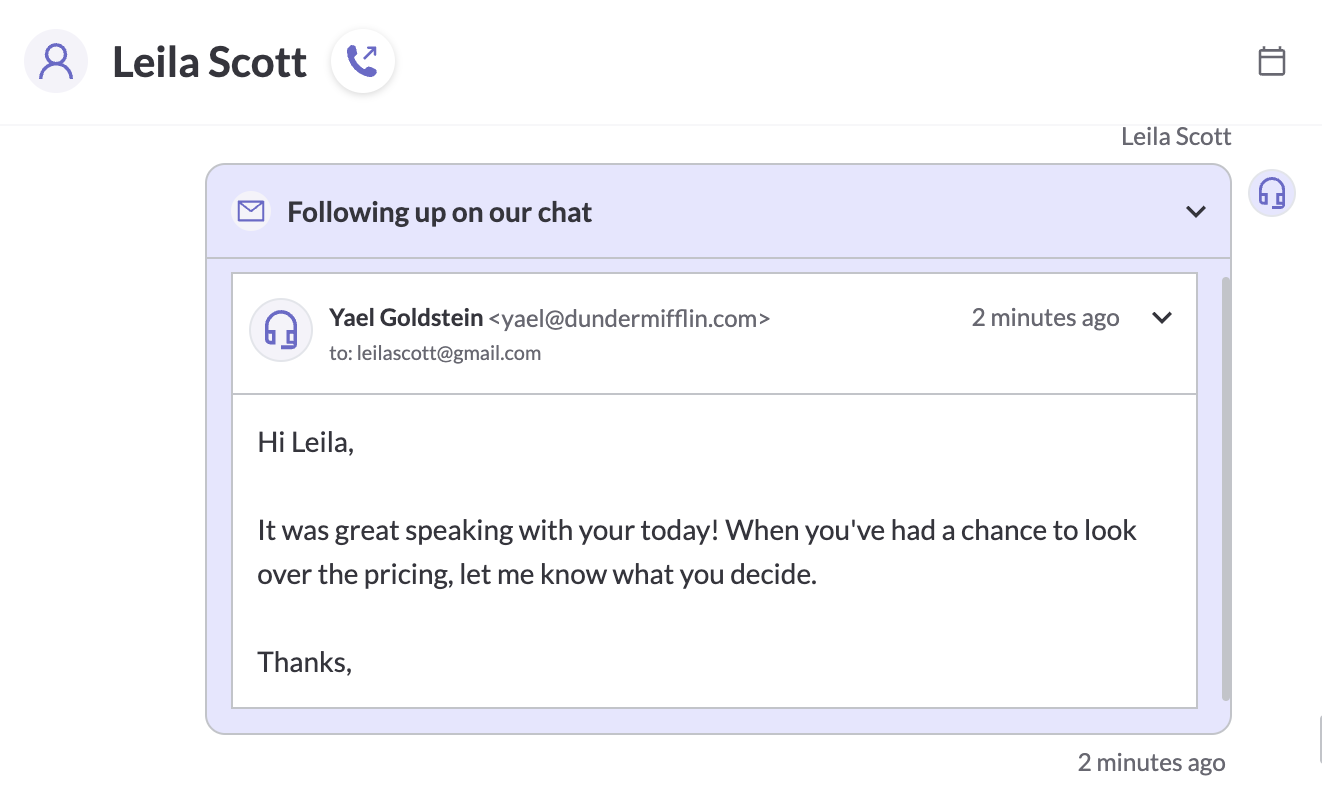
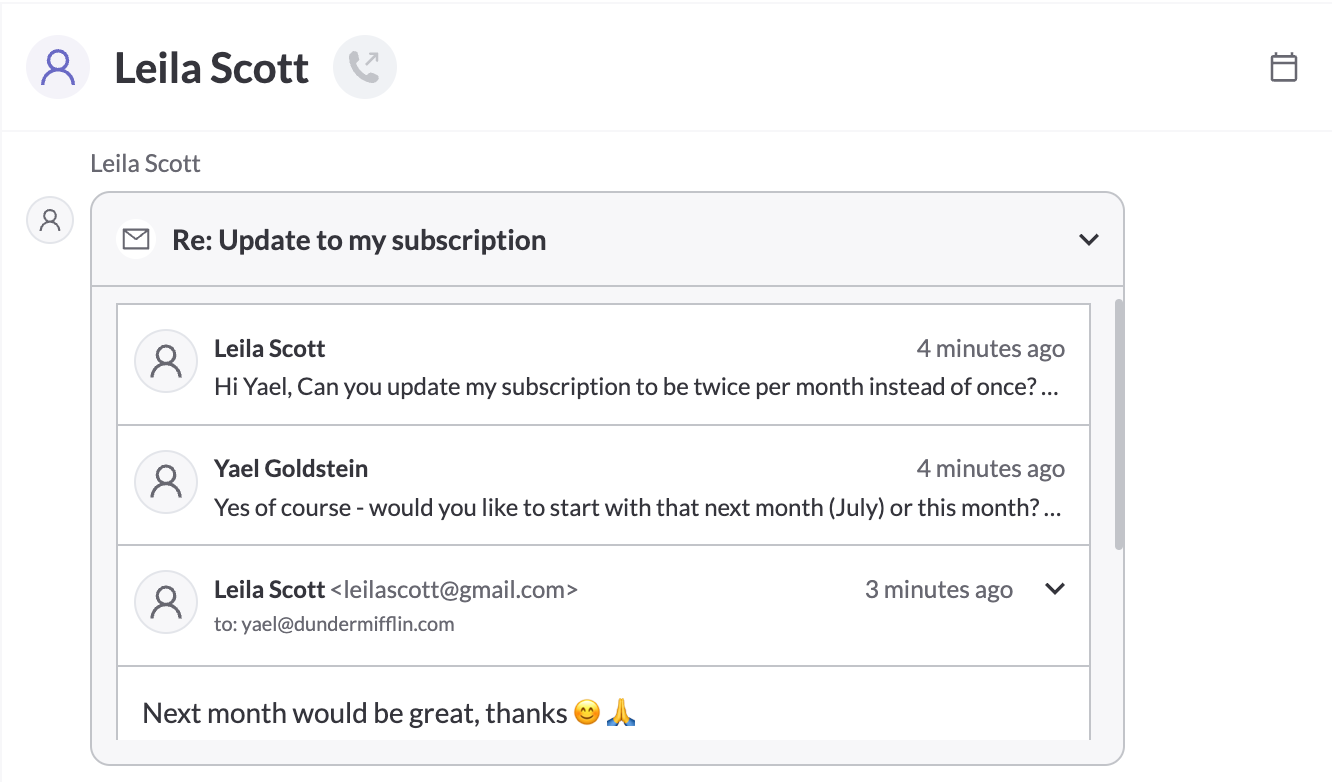
In a customer's activity feed, messages that are part of the same email thread will appear together. When clicking into a thread, messages appear from oldest (at the top) to most recent (at the bottom). The timestamp of the thread is that of the most recently-sent email.
Email Signatures 🖊️
You can optionally include a signature at the bottom of your emails to increase the credibility of your outreach (e.g. by including your role or a profile picture) and include relevant links (e.g. to your company site or to book a call).
If you would like to turn on email signatures using your Gmail or Outlook integration, please contact Regal Support.
Gmail Signatures
Regal automatically appends the default signature set up in your Gmail account to any emails you send from the Agent Desktop. For access, reach out to your Customer Success Manager.
To set up a signature in Gmail, click on the 'Settings' icon in the top right corner of your inbox.
Then click "See all settings."
In the Signature section, compose your signature(s). The signature you have configured as the default for new email use (shown in the pink box below) is the one Regal will append to any emails you send from Regal.
Once an email sent, the body and signature will appear in the contacts' conversation history.
Outlook Signatures
To set up an Outlook signature, click the Edit button for your connected Outlook account in 'My Settings'.
Then input your signature in HTML format. You can optionally preview the signature before saving. To remove your signature, delete all the HTML in your signature input.
Saved signatures will be appended to every outgoing email in Regal, which will appear with the signature in the contacts' conversation history.
If you already have a signature set up in Outlook, you can translate it to HTML format via the following steps:
1. Copy your Outlook Signature into a TextEdit doc (if using Mac) or Notepad (if using Windows) and save as a .html file.
2. Open your .html file in a browser.
3. Right click and select 'View Page Source'.
4. This is the HTML version of your Outlook signature, which you can paste into Regal.
Reporting 📊
You can track the volume, reach, and business impact of your email conversations in the "Email Performance Dashboard" in the Reporting page.
Note: Regal's use and transfer of information received from Google APIs to any other app will adhere to Google API Services User Data Policy, including the Limited Use requirements.